 The DPC Watchdog Violation indicates a blue screen death error on Windows devices. This issue mostly appears on Windows 10, 8.1 but, it can be exhibited by other Windows versions as well. If you are dealing with such an issue, keep reading till the end.
In order to troubleshoot this BSOD problem, there are certain hacks that Windows users can apply. But before going through the fixes, you must check the reasons behind this error.
Table of Contents
Reasons why DPC Watchdog Violation Occurs
The knowledge of the underlying cause helps to deal with the issue more effectively. Let’s check the probable reasons leading to this BSOD error.
- Unreadable HDD
- SSD firmware not up-to-date
- Outdated drivers
- BIOS not updated
- Incompatibility of hardware
- Improperly installed hardware
- Malware attack
If you already have detected the reason, you can apply the fix that matches with the reason. Now, let’s go through the fixes.
Fixes to Resolve DPC Watchdog Violation in Windows
We have presented the fixes as per their ease of application. So you can apply them in a proper order to troubleshoot the violation error. Let’s get started with the fixes.
Fix 1: Check the Connections
This is the primary fix that everyone should opt for. It requires no technical step to get executed. You just have to check whether each and every connection is well-established.
First, make sure that the cables of disk data and power are duly attached. If they are not, then this error is very common in Windows 10. If there is no issue with the cables, then move on to other fixes cited below.
Fix 2: Adjust SATA AHCI Driver
 Among other fixes, this fix should also stay at the top in the list of solutions. Most of the users got relief from the DPC Watchdog Violation in Windows 10 through this fix. For adjusting the SATA AHCI driver, go through the steps below.
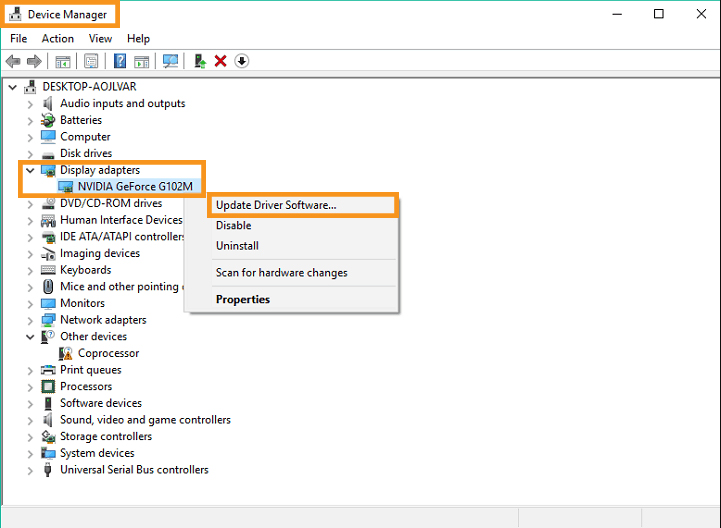
- Press and hold Win+X keys until you can see a context menu. Select the Device Manager option.
- Click on the “IDE ATA/ATAPI Controller” option to expand it.
- You can notice another option named “SATA AHCI Controller”. Right-click on it. Choose the “Properties” option from the drop-down menu.
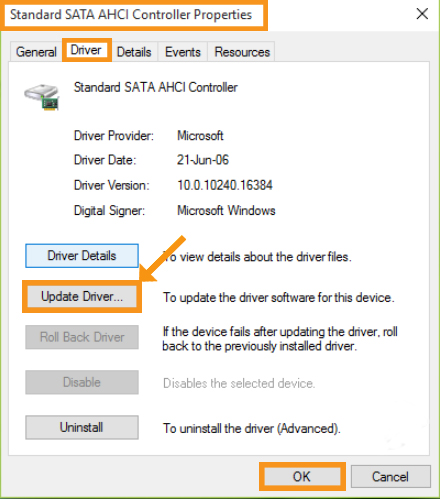
- Proceed to the Driver tab and opt for the “Driver Details” option. Ensure that “iaStorA.sys” is selected as a driver. Next, proceed with the OK button.
- Opt for “Driver” followed by the “Update Driver” option. After that, select ‘Browse my computer for driver software’. Proceed with the ‘Let me pick from a list of device drivers on my computer’ option.
- Choose the “Standard SATA AHCI Controller” followed by the Next tab.
After you have performed all these steps, you have to reboot your Windows device. Check if the error is still there. Well, you might have to apply Fix 2 every time after your Windows device gets an update.
Fix 3: Update Drivers
 If you have noticed “storachi.sys” in the properties of SATA AHCI, go through this solution. We have already mentioned that outdated drivers can lead to such a situation. Hence, make sure that all the associated drivers are duly updated on your device.
You can manually update the drivers just by searching the drivers from the manufacturer’s website. Don’t forget to install the latest drivers according to your system’s preferences.
To try this fix, refer to step 1 in the previous solution and go to Device Manager. Then select the list of devices/drivers that are either corrupted or outdated. Repeat the steps for updating the driver on right-clicking each item on the list.
Now, check if the issue still appears.
Fix 4: Check the Disk
 If your device comprises an SSD, better check if its firmware needs an update. Keep in mind that the update will erase all data from the SSD. Otherwise, you can try another hack and check the errors of your disk. Use the steps below to accomplish the task.
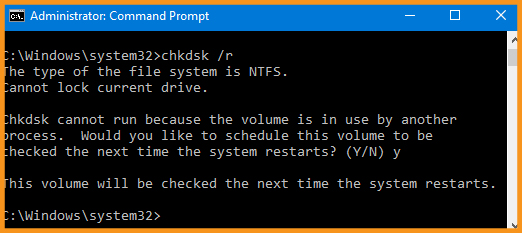
- Open a Command Prompt window. You can use your search box and type “command” to open it.
- Then enter the following command followed by pressing Enter key:
“chkdsk C:/f”
- It only detects the error. To solve the errors, enter the following command:
“chkdsk C: /r”
This will eradicate the errors related to the drives on your device.
Fix 5: Update the Operating System
 Are you running your Windows device on the latest version? If not, then this should be the cause of the DPC Watchdog violation issue. An outdated Operating System can easily lead to this issue. So, apply the fix and watch if it removes the error.
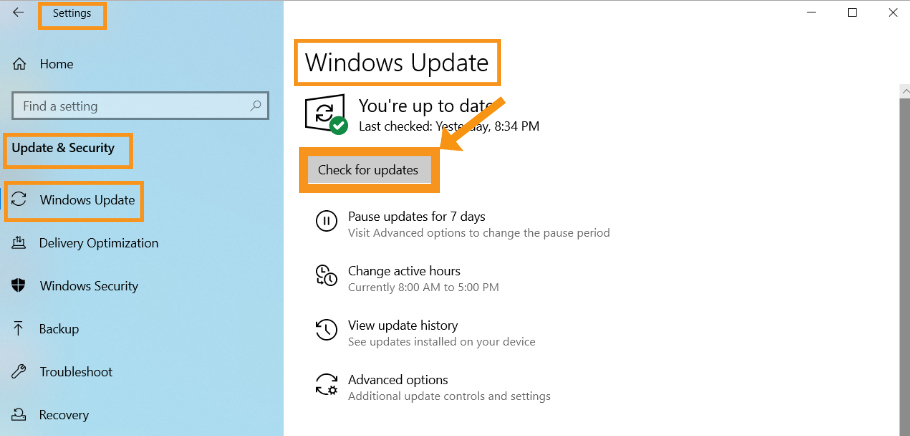
- Click on the Windows logo at the bottom-left corner of the device-screen.
- Next, look for the Settings application.
- After that, proceed to the “Update & security” section and click on it.
- Finally, opt for the Windows Update option from the window. It will automatically check if any update is available for your Windows version.
After the update is complete, check if the BSOD issue persists.
Fix 6: Perform a Full System Scan
 A malware-attack can lead to violating the DPC Watchdog. But, many users have claimed that the issue vanishes after they performed a full system scan of their devices. You should try this hack if you are still struggling with this error. Hence, take a look at the steps mentioned below.
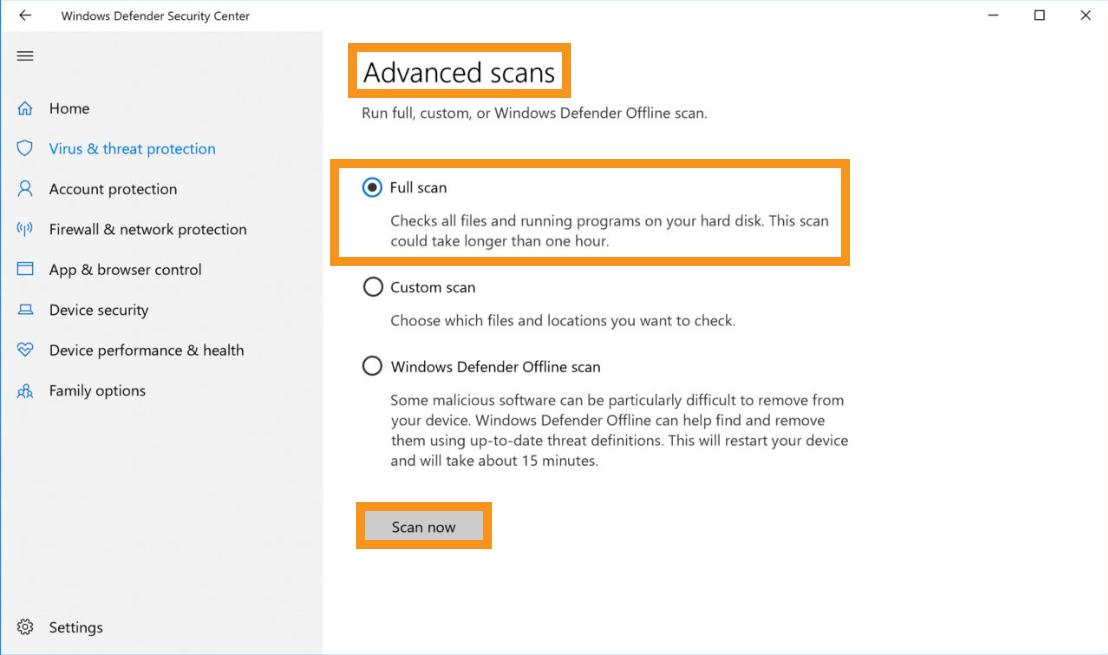
- Open the Start menu. Type ‘defender’ in the search box. Locate the Windows Defender option. Double-click to launch the defender.
- You have to choose the Shield icon from the left pane of the window.
- Select the “Advanced Scan” option from the bottom section of the window.
- Lastly, click the “Full Scan” option.
After performing a full scan of the system, restart your system to check the error condition.
Fix 7: Use Event Viewer
 This doesn’t solve the error but, might find the culprit for you. Follow the guidelines as mentioned below to try this hack.
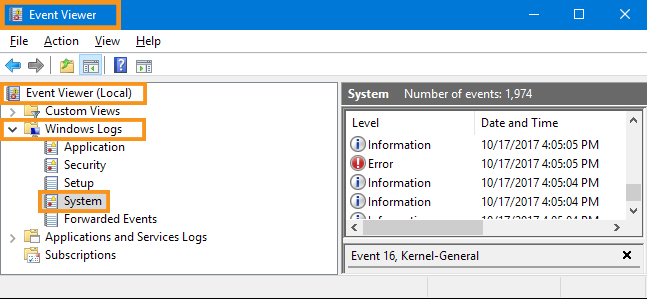
- Press and hold Win+X keys to launch the context menu. Opt for the “Event Viewer” option.
- Select “Windows Logs” followed by the “System” option from the left pane of the window.
- You may notice a window consist of some Error or Warning.
This lets you know where the error lies in your Windows 10.
Fix 8: Use Program Compatibility Troubleshooter
 You can use a built-in troubleshooter for Windows devices to check the compatibility of software and hardware. Stick to the guidelines to accomplish the task to remove the issue of DPC Watchdog Violation Windows 10.
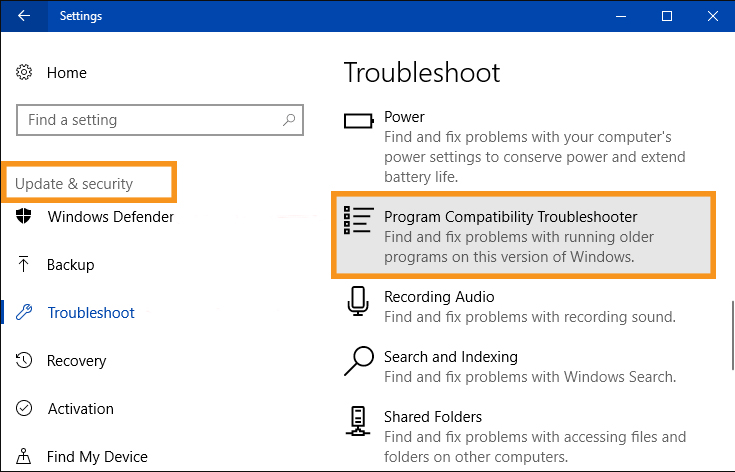
- Go to the Settings application.
- Navigate to the “Update & Security” option.
- Locate the ‘Find and fix other problems’ option.
- Choose “Program Compatibility Troubleshooter” to run it.
Check if the issue remains the same.
Fix 9: Perform System Restore
 If nothing is working to solve the issue, you can rewind your system in time to get rid of the annoying issue. For Windows 8.1, and Windows 7 users, you can go through the guidelines below.
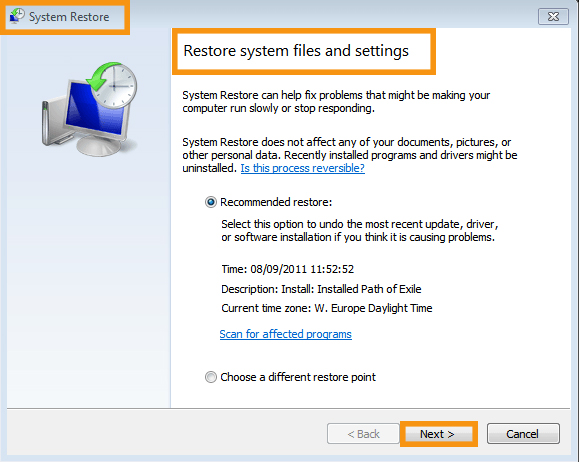
- Look for ‘System Properties’ on the Search box. Click “System Restore” and navigate to the “System Protection” section.
- Choose System Restore and select a point for the restoration.
- Tap “Next” followed by the “Finish” button.
Finally, check if the PC is showing the same error after restarting.
If you own Windows 10, then you need to follow the guidelines below.
- Navigate to Settings and click the “Update & security” option.
- Choose the Recovery option from the left pane.
- Locate “Reset This PC”. Click on the “Get Started” option.
- Select the ‘Keep My Files’ option.
After that, follow all the on-screen guidelines to perform a successful system restore.
Hopefully, the guide helped you to recover from the DPC Watchdog Violation issue. If you are still facing the error, consider uninstalling the apps that you have recently installed on your device.