 Basic Disk and Dynamic Disk are the two types of Disk in the hard drive list. Dynamic Disk is more advanced than Basic Disk as it can keep track of all partitions without using a partition table.
Using a logical disk manager or virtual disk service tracks the information of dynamic partitions or volume. If you want to organize the hard drive, convert to Dynamic Disk from Basic Disk.
Table of Contents
Converting to Dynamic Disk Instantly
Now, you might want to know what is convert to Dynamic Disk’s exact process. Here are the steps that you have to follow to do that.
Method 1: Convert to Dynamic Disk with a Disk Management
 You can easily convert the Basic Disk to the Dynamic Disk using Disk Management.
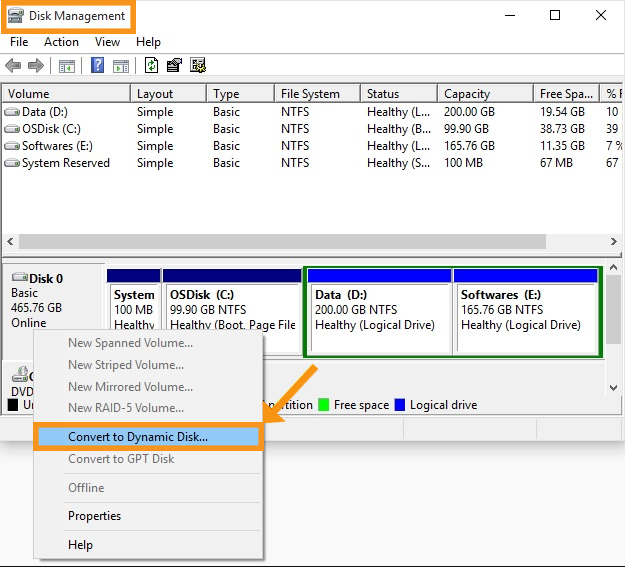
- First, right-click on the Windows button, select the Disk Manager from the pop-up menu. It will directly take you to the Disk Management interface.
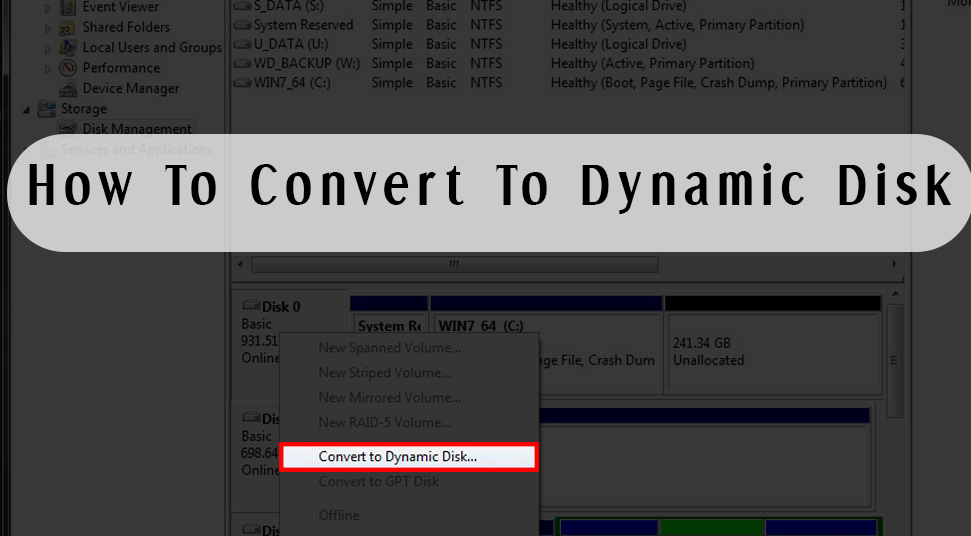
- Then, you have to choose “Convert to Dynamic Disk” from the pop-up window after right-clicking on the Basic Disk. Now, continue to follow the wizard.
You will see two kinds of operation:
- Warning 1: You will get the first warning message if there is a data partition in the target Basic Disk.
- Warning 2: You will get the first warning message if there is a system partition in the target Basic Disk.
You will be told by both of these two warning messages that except the present boot one, from any volume on this disk, you cannot start the installed operating system.
So, if you want to run dual or multi Windows, you should not convert the Basic Disk to the Dynamic Disk.
Method 2: Converting to Dynamic Disk with a Diskpart
 You can also convert the Basic Disk to the Dynamic Disk using a Diskpart. Here are the steps that you have to go through.
- Press the Windows key and the R key together on the keyboard to open the Run utility.
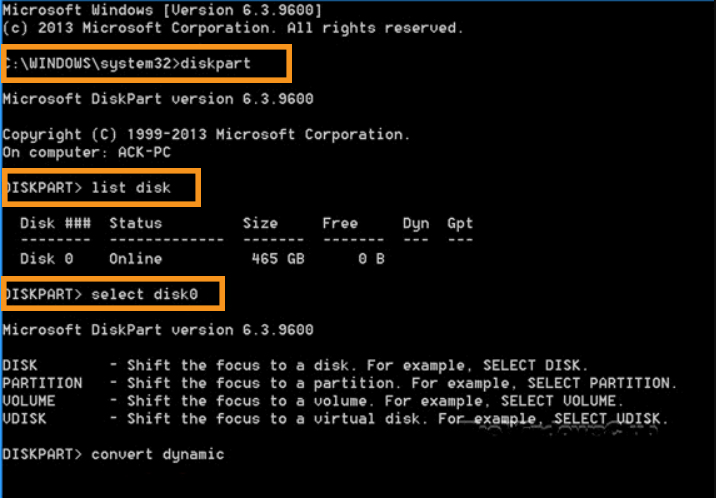
- Then, you have to press the Enter key after typing “diskpart”. This will take you to the Command Prompt window.
- Type “list disk” and press the Enter button. You have to note the number of the disk that you are going to convert to Dynamic.
- Then, you have to type “select disk 0” and press the Enter button. [Here 0 is the number of the disk that you are going to convert to Dynamic]
- Now, press the Enter button after typing convert dynamic.
- You have to type “exit” and press the Enter button when the process will finish. This will end the disk converting process.
These were the ways, following which you can convert your Basic Disk to Dynamic Disk. Hopefully, you will be able to convert the Basic Disk to a Dynamic Disk.
Frequently Asked Question
What happens after converting the Basic Disk to the Dynamic Disk?
After creating a fresh volume on a Dynamic Disk, you will not be allowed by Windows to install Windows onto the new volume.
You have to be careful about converting the Basic Disk to a Dynamic Disk. If the files of the disk are open, the conversion will not happen.
What is a Dynamic Disk?
Dynamic Disk is initialized for dynamic storage. Dynamic volumes like mirrored volumed, striped volumes, RAID-5 volumes, simple volumes and spanned volumes stay inside a Dynamic Disk.
Without restarting Windows you can execute volume and disk management with dynamic storage.
What differentiates Dynamic Disk from Basic Disk?
A Basic Disk manages data on the hard disk using logical drives or partition tables. But Dynamic Disk only uses dynamic volumes to do that instead of partition tables.
Will the data be lost after converting it to a Dynamic Disk?
You do not have to deal with data loss if you convert your Basic Disk to Dynamic Disk using Disk Management or Diskpart. If you convert Dynamic Disk to a Basic Disk, you will face data loss even if you are using these two processes.
Can I convert the Dynamic Disk to Basic Disk back again?
All the volumes you have to back up on the disk if you want to convert the Dynamic Disk back to a Basic Disk. You have to get into Disk Management first. Then, right-click on every volume on the Dynamic Disk that you are going to convert. After that, you have to select Delete Volume for each volume.
